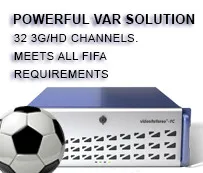
Sports Video Refereeing
Can 11-channel videoReferee® system be reconfigured for 6 cameras?
Depending on your system, its interface can be configured to work with the number of cameras you require.
Changing the number of cameras is done in the Slomo.tv Launcher program.
To change the number of cameras in an existing project:
-
Open Slomo.tv Launcher. Shortcut:

-
Select the project where you need to change the number of cameras and click the Edit button (
 ) in the project row;
-
In the opened "General" tab, change the Number of Channels according to the required number of cameras

-
Go to the "I/O Boards" tab and ensure that the device-camera connectors (cameras are marked with the
 icon) correspond to the server's
physical connectors to which the cameras are connected. To facilitate this task, refer to the Connectors
Scheme in the upper right corner of the tab.
icon) correspond to the server's
physical connectors to which the cameras are connected. To facilitate this task, refer to the Connectors
Scheme in the upper right corner of the tab.

If cameras are controlled via Ethernet (VR cameras) or transmit signals via the NDI interface, also ensure they are assigned the correct IP addresses
-
Save the project: in the "Summary" tab, click the Save or Save As button


The above described a quick way to change the number of cameras, however, for significant changes, the best solution is to create a new project and configure the required settings in it.
Supported scoreboard controller types?
All videoReferee® servers are directly integrated with the Slomo.tv Control-MC scoreboard controller. Additionally, they support working with the following types of scoreboard controllers: Westerstrand, Nautronic NTpult, Nautronic NAUCON-1000, Bodet, Omega Saturn, Megalux, NataInfo, Victory, VITA, Araneus-NGLight, ElTablo, Stramatel, Colosseo, CEDR, Favero Console-700.
I would like to use videoReferee® for a sport not listed on you website. Can you help?
We are very interested in expanding the list of supported sports. Please contact technical support, and we will try to help you.
I want to use scoreboard controller that is not on the list of supported types. What to do?
Contact
For integration we need manufacturer's documentation describing the protocol and physical interface.
Support will provide estimate for this service.
How to connect an additional referee's workplace to videoReferee® system?
-
Connect the referee remote control and monitors of the additional workplace to the videoReferee® server
-
Open Slomo.tv Launcher. Shortcut:
-
Select the project where an additional referee workstation is required and click the Edit button (
) in the project row;
-
In the opened "General" tab, click the + button in the "Video Referee Interfaces" section

-
Configure the new workplace
- Select the interface through which the referee remote control is connected: COM or Ethernet
- Enter the port number for the COM option or the IP address for the Ethernet option.

When using a COM port, you can also detect the remote control automatically – click the Refresh (
 )
button and select the device from the list.
)
button and select the device from the list.To verify the correctness of the specified settings, click the connected remote control test button –
 .
.
-
Go to the "I/O Boards" tab and find the new device with the Role "Video Referee N", where N is the referee workplace number, marked with the icon
 .
.
Configure the Type (Blackmagic Design or Display) and in the Connector setting, select the connector/display number for outputting the referee interface.
-
Save the project: in the "Summary" tab, click the Save or Save As button


How to rename the event buttons in Slomo.tv Launcher?
To modify event marks and assign them to specific buttons:
-
Open Slomo.tv Launcher. Shortcut:
-
Select the project where you need to modify event marks and buttons and click the Edit button (
) in the project row;
-
In the "Video Referee Settings" section, click the Event Marks and Buttons Configuration

-
In the opened window, configure the required event marks and buttons

- Change the value of the required event mark
- Select this mark in the dropdown list of the button to which the tag needs to be assigned
- Click OK to save changes and close the settings window
The assigned mark remains bound to its button, and when renaming a mark, it is not necessary to reassign it – simply change its value in the "Event Marks" section, and the button will automatically adopt it.
-
Save the project: in the "Summary" tab, click the Save or Save As button

How to rename the event buttons in videoReferee® interface?
To rename a button, enter a new name [1] in the input field and double-click the right mouse button on the button you want to rename. The length of text is limited by the size of the button.


[1] Characters entered as the name of the button should be encoded in ASCII. Symbols encoding different from the ASCII, may be displayed incorrectly on the screen.
How to rename an event in the list of events?
Created events, by default, are named Ev:. This name can be easily changed to more appropriate one. To rename the event, enter the name of the event in the name input field or select the button with the corresponding event name. Select the event, which will be renamed and double-click the right mouse button on the event status bar.


We use the videoReferee® server and need to label events and key moments and then search for marked values.
The Control-VR controller is used for quick key assignment to events.
To do this, you can switch to the event key assignment mode – press the Mode key (blue color).
In this mode, the channel keys are used to assign keys to created events.
To assign a key:
- Select the desired event from the event list.
- Press the key with the name that fits the selected event.
For example, for football, the keys can have the following values:
- Home
- Guest
- Red
- Yellow
- Goal
- Offside
- Hand
- Fight
To assign a key to an event (without switching to the key assignment mode), you can use the Alt+Ch.№ button combination.
Previously used keys will have a brighter backlight.
Subsequently, the keys can be used when searching for events – using the Search button.
We use videoReferee® for rugby and our league's requirement is to show the video refereeing process on the video cube and in TV broadcasts. How can we do it?
-
Open Slomo.tv Launcher. Shortcut:
-
Select the project where you need to output the video refereeing signal and click the Edit button (
) in the project row;
-
Go to the "I/O Boards" tab and find the device with the Role "Video Referee", marked with the icon
.
- Ensure that this device has the Type "Blackmagic Design" (video capture card) set
- In the Connector setting, specify the required SDI connector number from which the video refereeing signal should be output.

For convenience, use the connectors scheme in the upper right corner of the tab – the video refereeing output connector will be indicated in white color.
-
Save the project: in the "Summary" tab, click the Save or Save As button
What type of cable and connectors do you recommend for coaxial line installation when using Slomo.tv mini-vR-Cam and mini-GoalNetCam cameras?
For coaxial line installation, we used DRAKA HD PRO 1.0/4.8 AF cable and Neutrik NBNC75BUU11X connectors. This combination has proven reliable for transmitting 3G-SDI signal over distances up to 80 meters.
For distances exceeding 80 meters, we recommend using Blackmagic Design optical Fiber 12G optical converters.
What PoE standard do mini-vR-Cam cameras comply with? What PoE switch do you recommend?
Our mini-vR-CAM cameras fully comply with the PoE standard IEEE 802.3af. Input voltage range from 36V to 57V, isolation up to 1500V.
As a PoE switch, for example, you can use the Orient SWP-7516 POE / 2P / 2SFP PS 1GB 18 x RJ45.
Any Ethernet cable of category 5e or higher can be used.